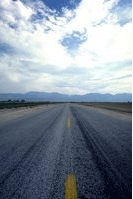
Selecting objects without clear, continuous edges is hard. Fine hair and flames are in this category. The main tricks for selecting these things out of a picture are: 1. Use channels; 2. Use all the tools or methods you can find to inscrease contrast between the object you want to select and the background. Contrast is the key! (I sound a little crazy here, but I am sure many photoshoppers understand what I mean.)
Before:
After:
Tuesday, July 31, 2007
Sunday, July 22, 2007
Friend Engaged
This is not about photoshop even though I had to use it. This is a "gift" for a friend who recently got engaged. I borrowed his engagement picture from his blog (although I do hope it has higher resolution :)). Will, congratulations! I wish you and your bride live happily ever after!
Rose Pedals Hand Made
Aren't these the most beautiful rose pedals? Yes, they are 100% created with photoshop. Here is how.
Thursday, July 19, 2007
Stress Reliever
Wednesday, July 11, 2007
Photoshop Inner Glow and Color Match
Inner Glow
Very often after you put your selection from one image on to another (which creates a new selection layer on the later), depending on the original image's background you will see something called "halo" along the outline of the selection layer.
To remove the halo, we can use the Inner Glow tool. My understanding of Inner Glow is - it is a technique that uses a glow along the inside of the selection layer and let it "glow" and cover up the halo color from the original image's background.
Set the blend mode to Color (reduce the opacity a little bit afterwards). Use the color swatch to select a color closest to the major color of the selection layer. Select "Precise" from the Technique dropdown box to trace into the cornors of the selection layer and cover up all the haloing color. As for the "Size" value of Elements section, set it to a small value to keep the glow small.
I wish I am making sense here. But if not, at lease the phrase "Inner Glow" is kind of poetic. ;)
Match Color
Image -> Adjustments -> Match Color lets you bring the colors in one image or layer in line with those in another. Here "another" doesn't have to be the immediate layer beneath this layer. It could whatever layer that you want your current layer to match color with. In the "Match Color" window, set the layer that you want to match with (source layer) as the background. Adjust the Luminance and Color Indensity value accordingly to achieve better results. Finally, raise the Fade value to blend the two layers to make it more natural.
This technique is very useful in blending layers (obviously). Look at the following examples:
Before:
Subscribe to:
Posts (Atom)